Why Put Your Products on Instagram Shopping
Your customers are shopping on Instagram, so why not show them what you’ve got?
The internet added one million new users per day in 2018, and now, in 2019 almost 60% of the world’s population is online, according to the Digital Around the World in 2019 report by Hootsuite.
40% of internet users in the U.S. say they make online purchases several times a month, and 20% purchase something online at least once a week.
It’s 2019, and nearly half (45%) of the world uses social media.
Instagram is the ideal platform for ecommerce brands wanting to sell products on social media.
“Shopping on Instagram” provides your business with stickers and tags that turn your images and videos into an interactive product catalog.
It helps drive visitors through the sales funnel – and straight to your website to make the purchase.
Plus, Checkout on Instagram is coming soon. Before long (we hope) Instagrammers will be able to purchase your products without ever leaving the platform.
In this article, we give you a step-by-step checklist for getting your business completely set up with Shopping on Instagram.
We walk you through eligibility requirements, product catalogs, the approval process, and how to create shoppable content.
Bookmark it!
Bookmark this page, or download the PDF checklist, so you don’t get stuck trying to locate all these steps and processes from different URLs later.
The Ultimate Checklist to Get Your Business Started with Shopping on Instagram
In this guide, we show you exactly how to get your business set up with shoppable posts and Stories on Instagram.
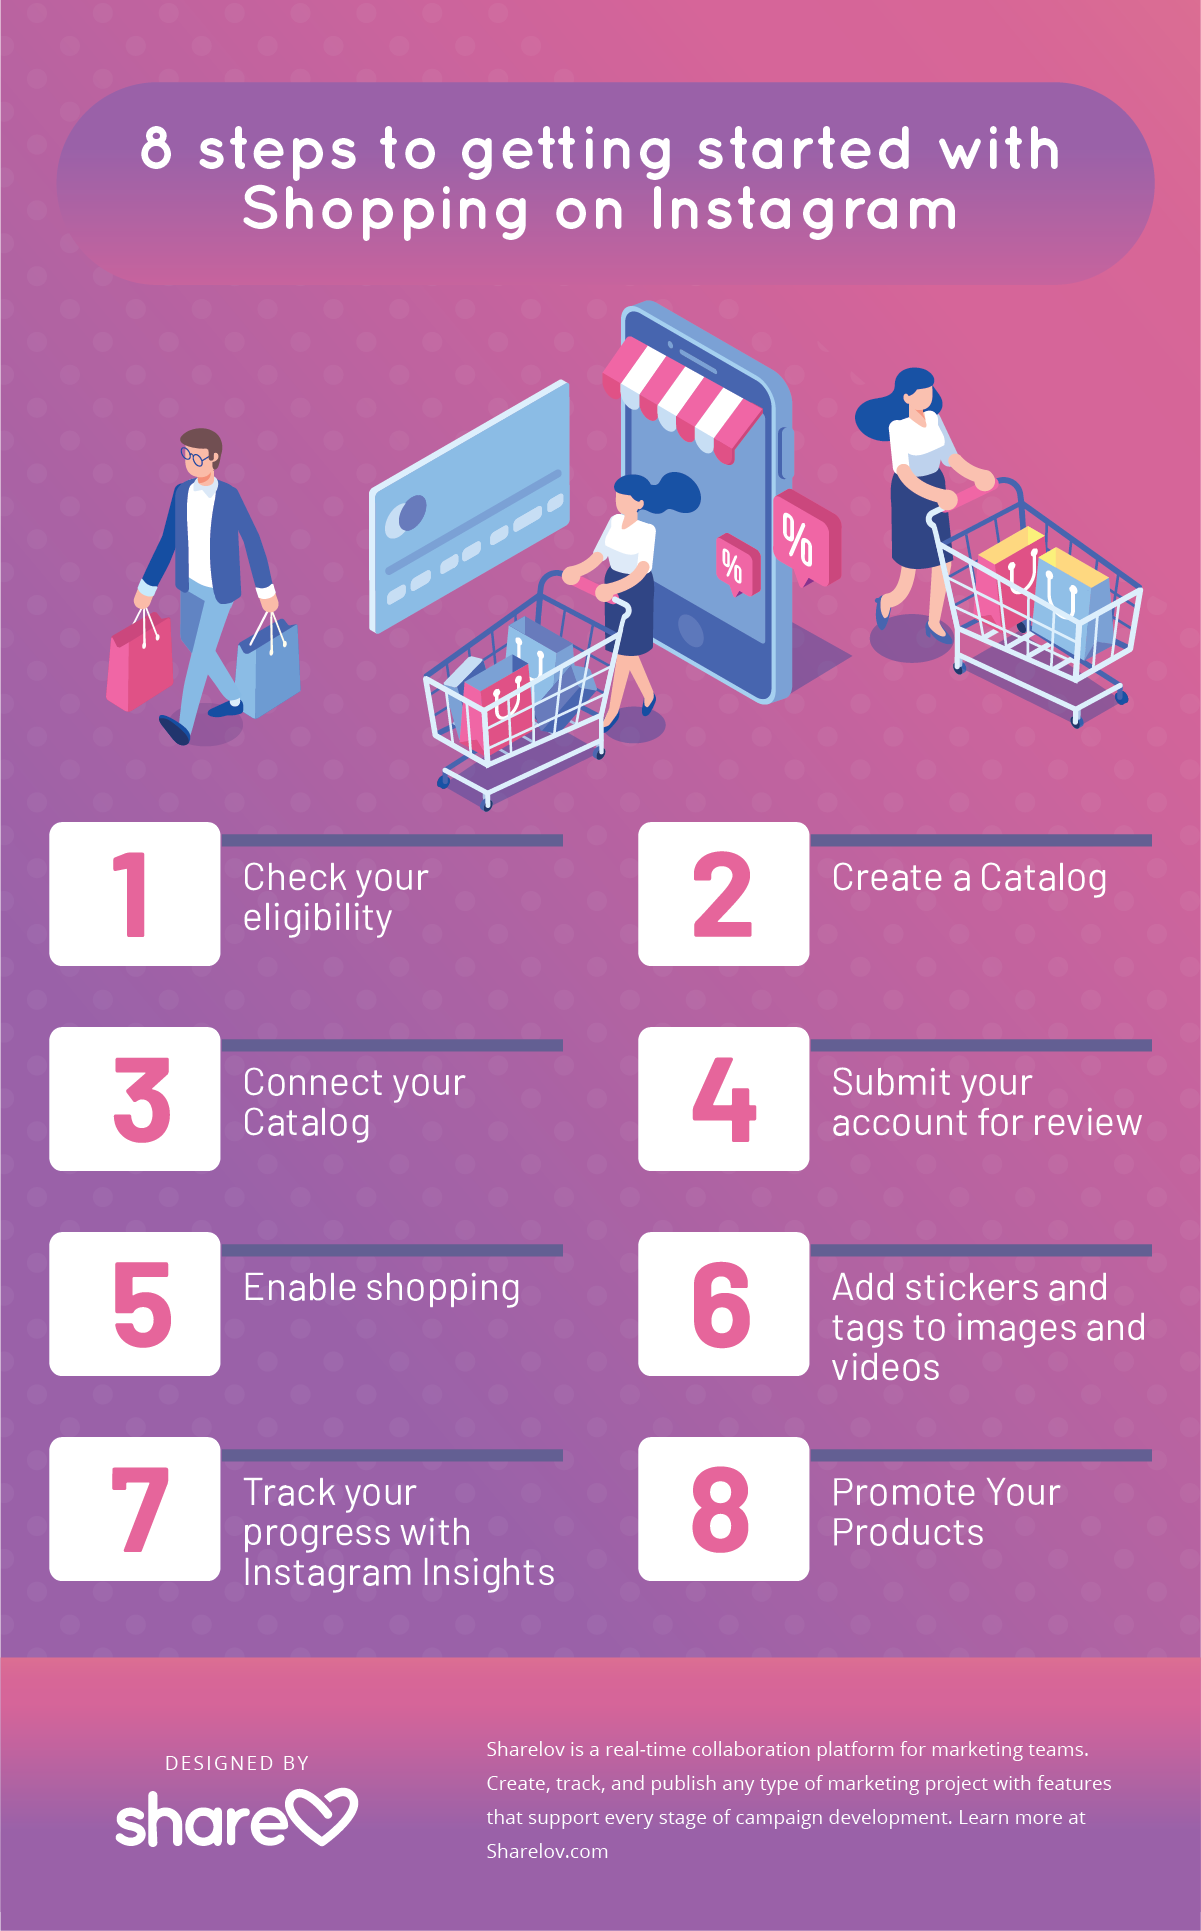
There are 7 steps to getting started with Shopping on Instagram:
There are 7 steps to getting started with Shopping on Instagram:
1. Check your business’s eligibility
3. Connect your Facebook Catalog to Instagram Business
4. Submit your account for review
5. Enable shopping in business settings
6. Add stickers and tags to images and videos
We’ll start the process by explaining the eligibility requirements in the first section.
1. Check Your Business’s Eligibility for Shopping on Instagram
In this section, we explain all the eligibility requirements you must pass to get approved to sell on Instagram.
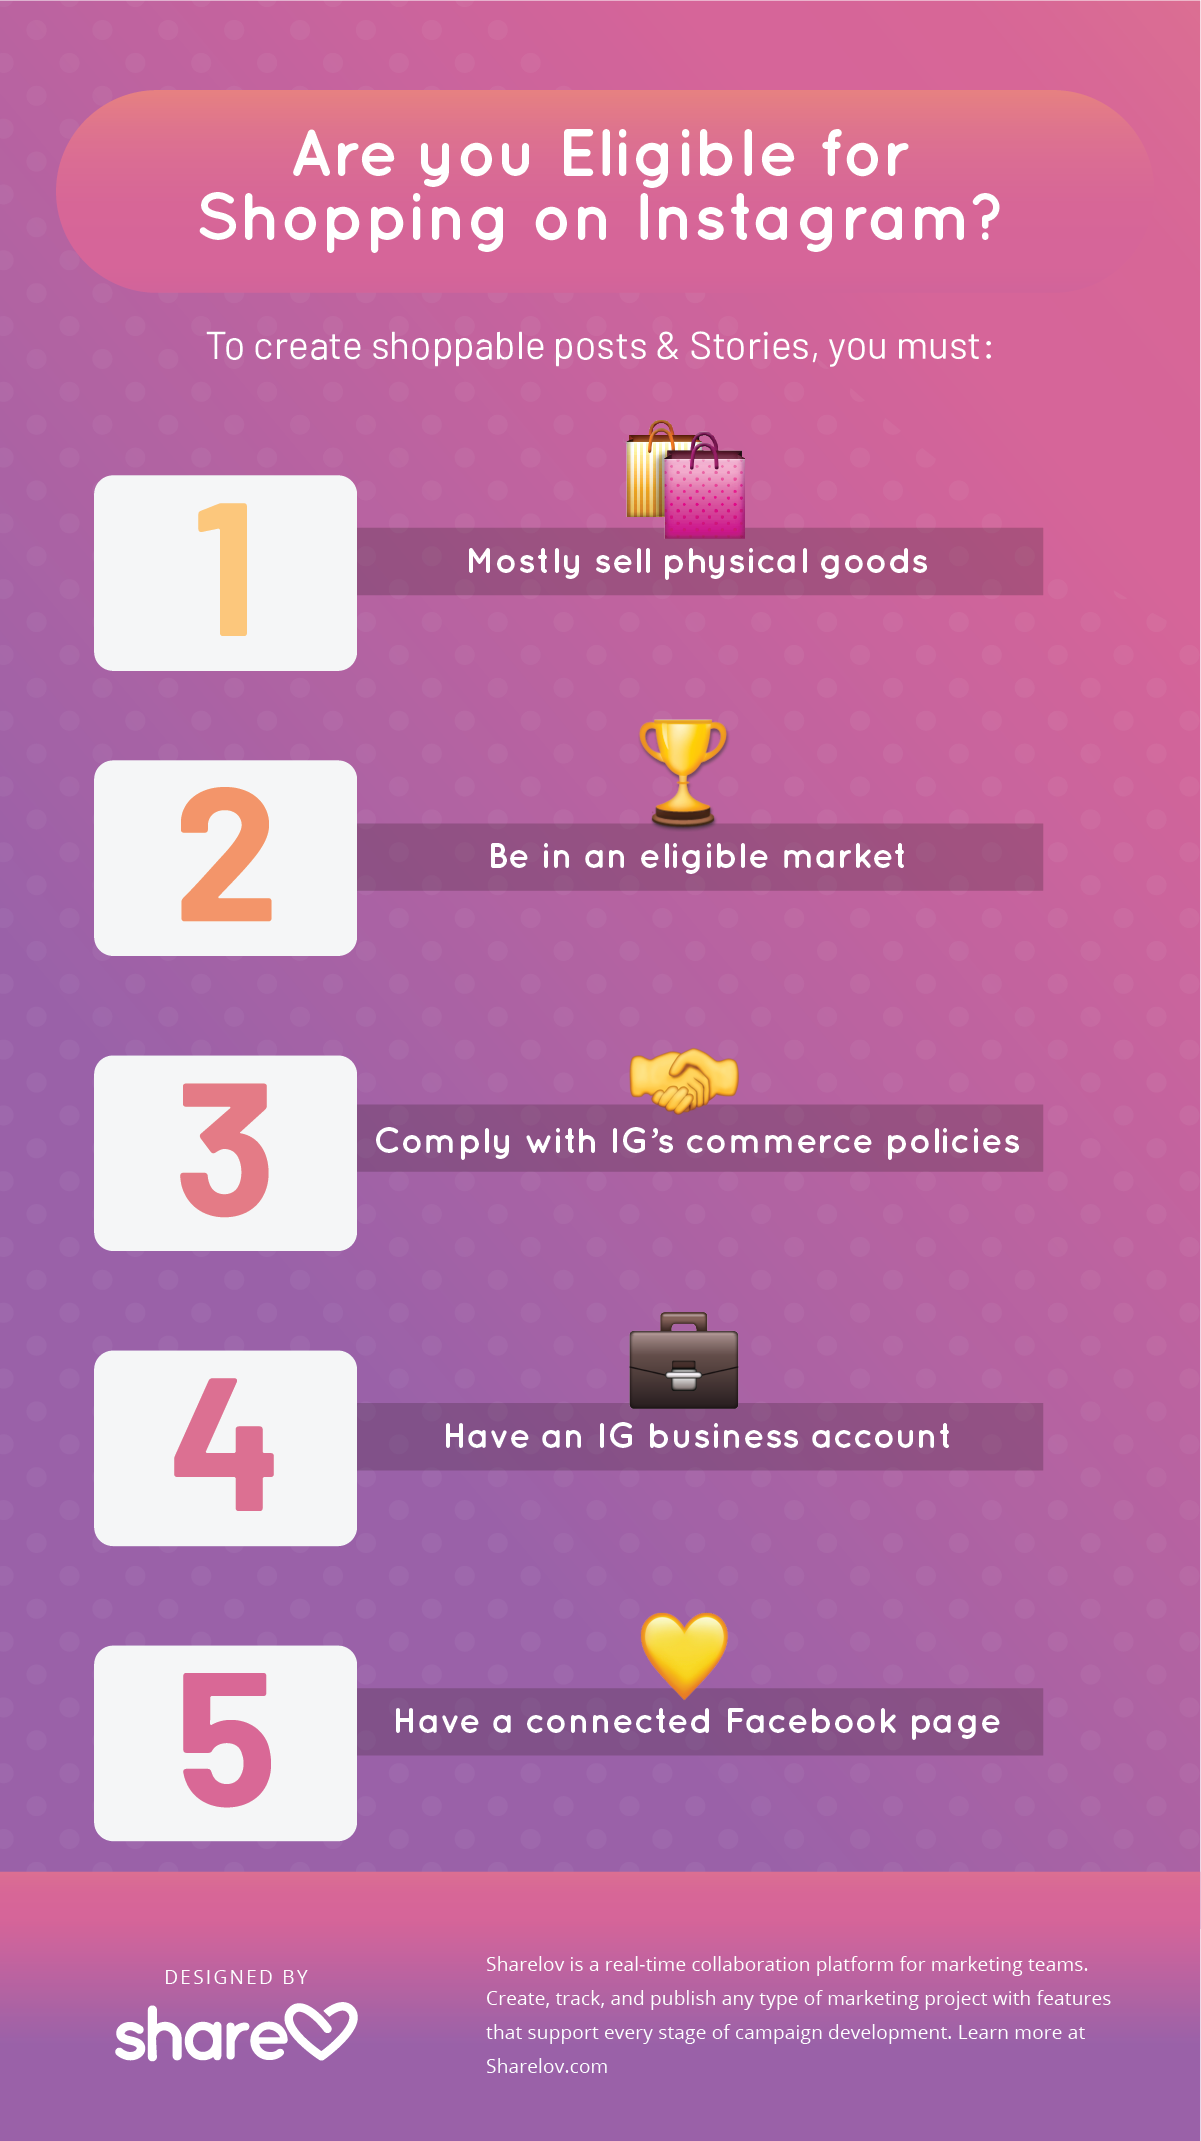
To be eligible, your business must primarily sell physical goods, and:
- Be in an eligible market
- Comply with Instagram’s commerce policies
- Open an Instagram business account, if you don’t have one already
- Connect a Facebook page, if you haven’t already
North America
Shopping on Instagram is available for North American businesses in:
- Canada
- United States
Latin America
Shopping on Instagram is available for Latin American businesses in:
- Argentina
- Belize, Bolivia
- Brazil
- Costa Rica
- Dominican Republic
- Ecuador
- French Guyana
- Guatemala
- Guyana
- Martinique
- Mexico
- Panama
- Paraguay
- Peru
- Puerto Rico
- Suriname
- Uruguay
Europe, the Middle East, and Africa
Shopping on Instagram is available for EMEA businesses in:
- Austria
- Belgium
- Bulgaria
- Croatia
- Cyprus
- Czech Republic
- Denmark
- Estonia
- Finland
- France
- Germany
- Greece
- Hungary
- Ireland
- Italy
- Latvia
- Lithuania
- Luxembourg
- Malta
- Mayotte
- Morocco
- Netherlands
- Norway
- Poland
- Portugal
- Reunion
- Romania
- Slovakia
- Slovenia
- South Africa
- Spain
- Sweden
- Switzerland
- United Kingdom
Asia Pacific
Shopping on Instagram is available for Asian Pacific businesses in:
- Australia
- Japan
- Korea
- New Zealand
- Singapore
Are You In Compliance With Instagram’s Commerce Policies?
Commerce policies explain what’s prohibited, restricted, and disallowed by Instagram.
For example, drugs, tobacco products, unsafe supplements, weapons, and animals are among some of the prohibited items. Discrimination and third-party infringement aren’t allowed. Event tickets and gifts cards are restricted.
There are many more prohibited and restricted items and categories.
Have You Opened an Instagram Business account?
Your Instagram account should be set up as a business profile.
If you’re still using your personal Instagram account to promote your business, now is the time to make it official by converting to a business account.
Here’s how to convert your account from personal to business:
- Go to your profile and tap the menu icon
- Tap the Settings icon
- Tap Account
- Tap Switch to Business Account
- Add details such as your business or account category and contact information
- Tap Done
Have You Connected a Facebook Page?
Your business must have a Facebook page officially connected to your Instagram business account to be eligible for Shopping on Instagram.
How to connect a Facebook page to your Instagram business profile:
- Go to your Instagram profile.
- Select Edit Profile
- Under Business Information, select Page
- Choose a Page from your Facebook Pages to connect — or select Create a New Facebook Page.
Once you’ve connected your Facebook page, you’re ready to create your Facebook catalog, which is necessary to get approved and sell on Instagram.
2. Create a Facebook Catalog
Next, create a Facebook catalog and connect it to your Instagram account.
Please note: If you already have a Facebook Catalog with the products you want to include in your shoppable posts, you can skip this section and move on to #3 Connect Your Facebook Catalog.
Create a catalog directly using the Facebook Catalog Manager or have an approved partner such as Shopify or BigCommerce set one up for you.
Here’s how to create a Facebook catalog:
Step 1: go to Facebook Catalog Manager and tap “Create catalog.”
Step 2: choose your category, which is probably “ecommerce” if you’ll be using shopping stickers.
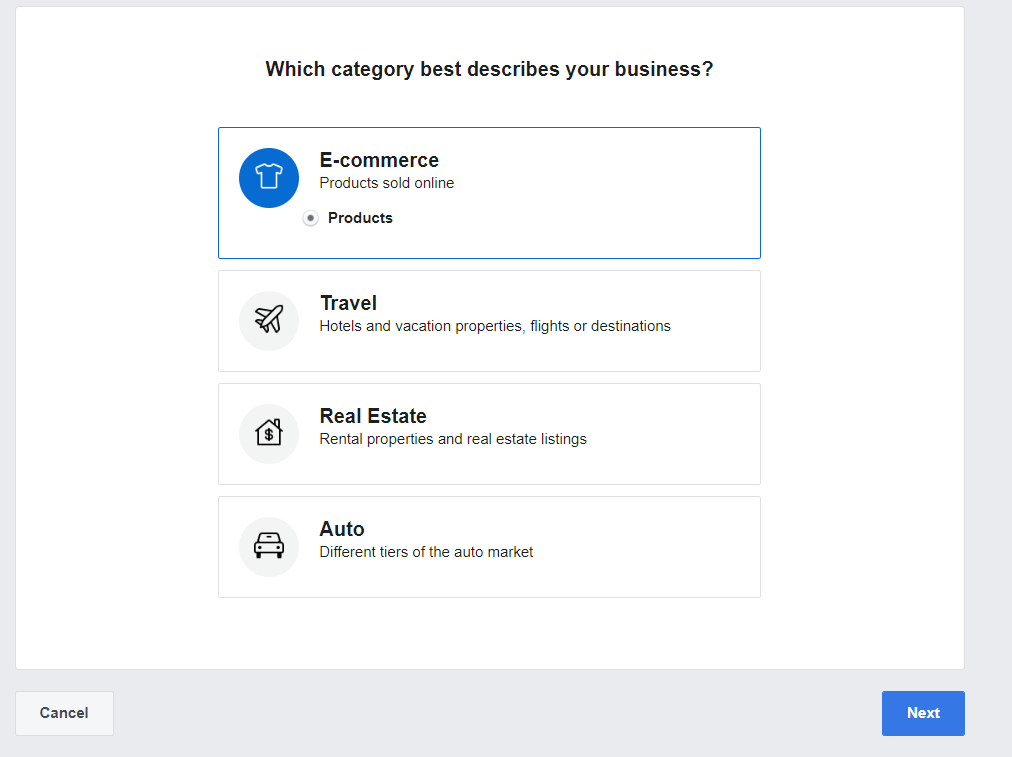
Step 3: Select the method you’ll use to configure your catalog settings.
You can upload your product information manually or import it from an eCommerce platform.
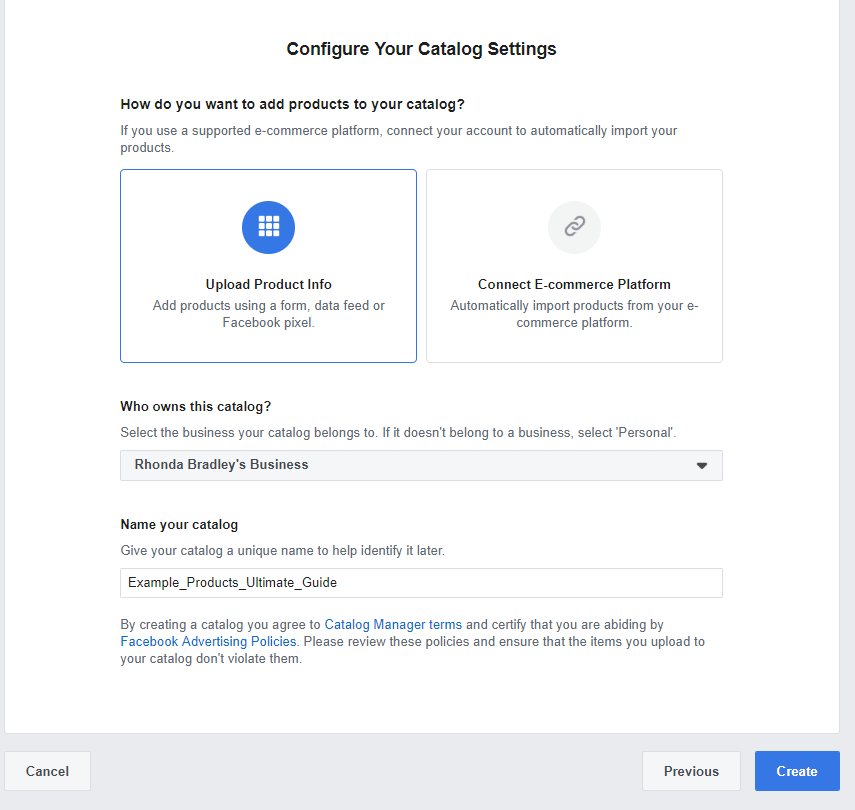
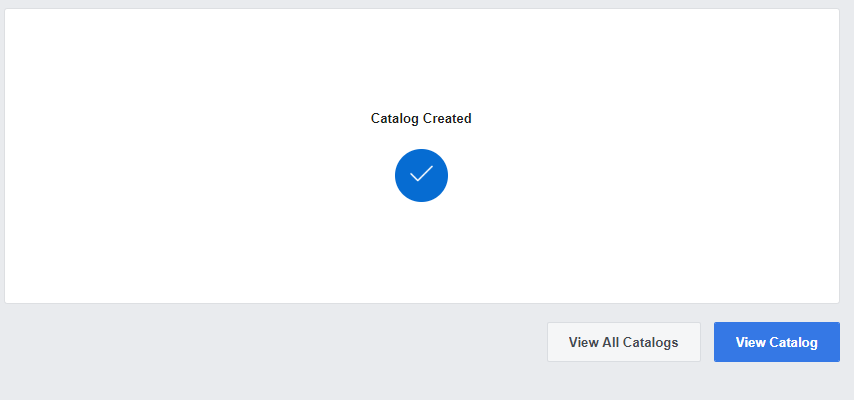
Once you tap “create,” your catalog is created. Tap “View catalog” to move to the next step.
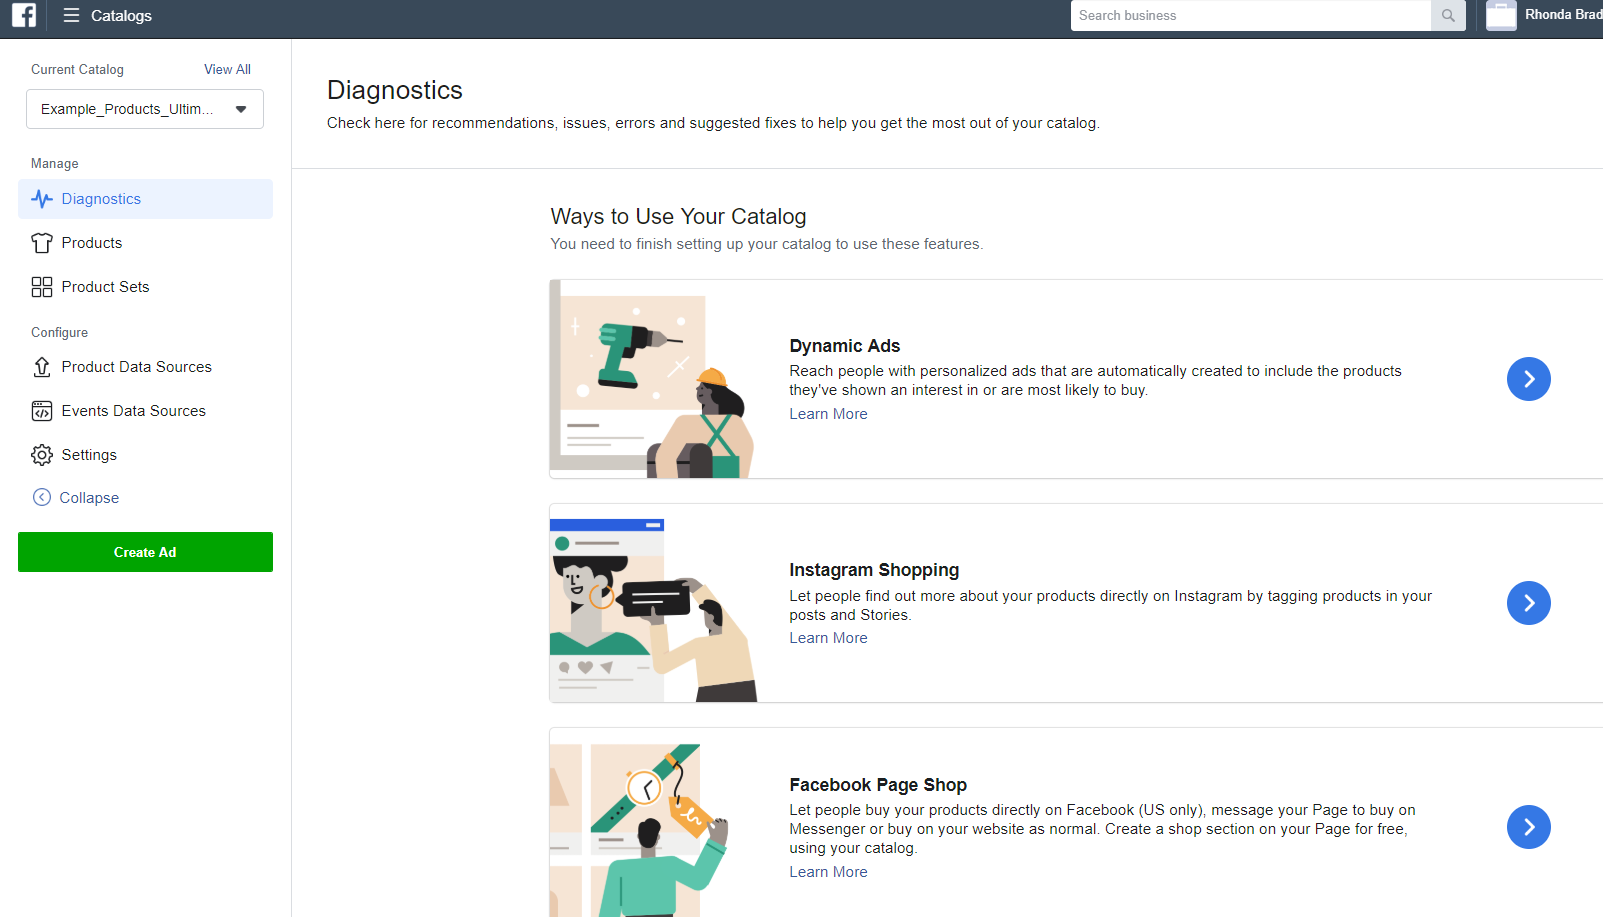
Next, the guide will ask you to choose how you’ll use your catalog.
Step 4: Choose “Instagram Shopping.”
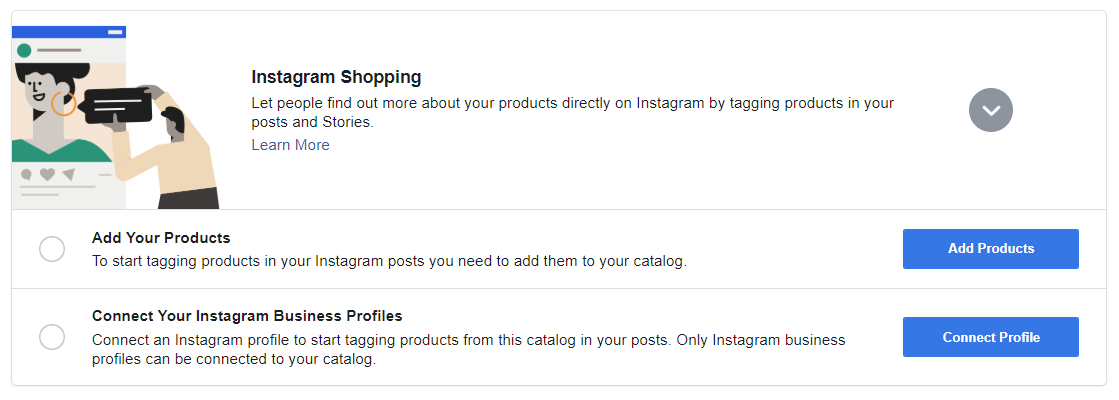
Step 5: Add products to your catalog.
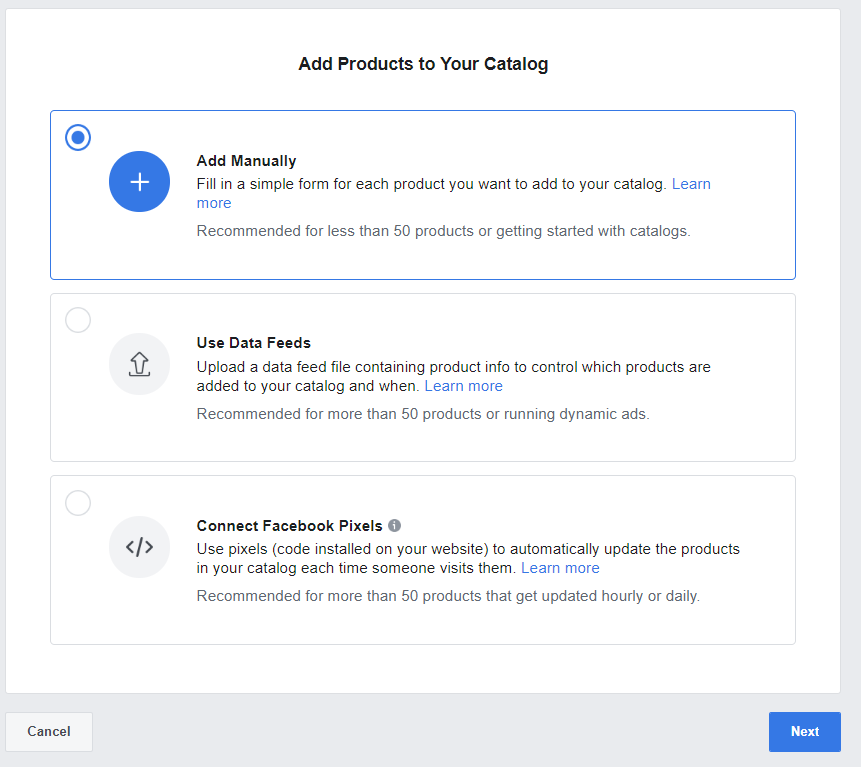
Adding products to your Facebook catalog can be done 3 different ways:
- Add manually: Use this option if you’re adding 50 products or less. When you add products manually, you’ll fill in a form for each product (example below).
- Use data feeds: for 50 + products, you can upload a data feed containing all your products’ information.
- Use Facebook Pixels: for 50+ products that get updated at least once a day.
Facebook Pixels is a code added to your website that automatically updates the products in your Facebook Catalog.
Manual Entries: Below is an example of the form you’ll fill out if you choose to enter your product information manually.
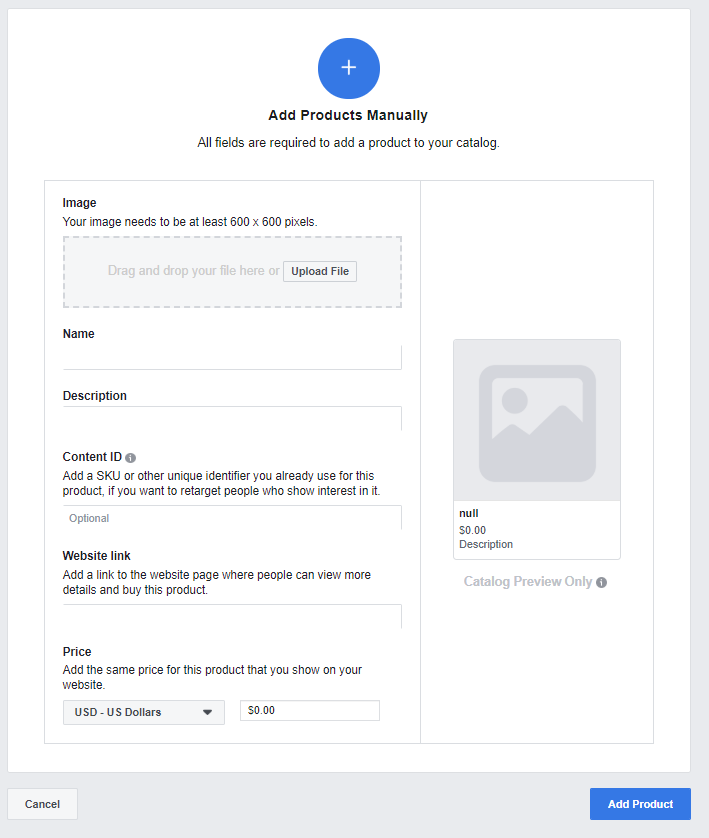
Step 6: Enter product information
You’ll need the following for each product:
- Product image
- Product name
- Product description
- Content ID (optional)
- Website link (to the product purchase page on your site)
- Price
Upload high-quality images and take your time filling out product descriptions that capture attention!
3. Connect Your Facebook Catalog to Your Instagram Business Account
Next, connect your Facebook catalog to your Instagram business account – it’s the final step before submitting your account for review!
Here’s how to connect your Facebook catalog to your Instagram business account:
- In the Catalog Manager, choose the catalog you want to connect.
- Go to “More ways to use your catalog”
- Select “Instagram Shopping”
- Choose “Connect your Instagram Business Account.”
4. Submit Your Account For Review
Now that you’ve completed steps 1, 2, and 3, you’re ready to submit your account for approval to Instagram.
Here’s how to submit your account for review:
- Go to your profile settings in the Instagram app.
- Tap “Business”
- Tap “Shopping on Instagram.”
- Follow the steps to make sure everything is ready, then submit your account.
Once approved, you’ll get notifications from Instagram. In the meantime, you can check your status anytime by visiting “Shopping in Settings.”
How long Does it Take to Get Approved for Shopping on Instagram?
According to Instagram, the process usually takes a few days. It can take a bit longer if they need to review the account in more detail.
5. Enable Shopping in Business Settings
Once you receive a notice from Instagram that you’ve been approved – Congrats! – you’re almost ready to create shoppable posts.
Now, there’s just one small step left — you need to enable shopping in your settings.
Begin by making sure your Instagram app is up to date.
Next, enable your business settings from within the Instagram app:
- Go to your profile and tap the menu icon.
- Tap the Settings icon.
- Tap Business.
- Tap Shopping.
- Tap Continue.
- Select a product catalog to connect to your business profile.
- Tap Done.
NOTE: If you don’t see the “Shopping” selection, you probably haven’t been approved yet.
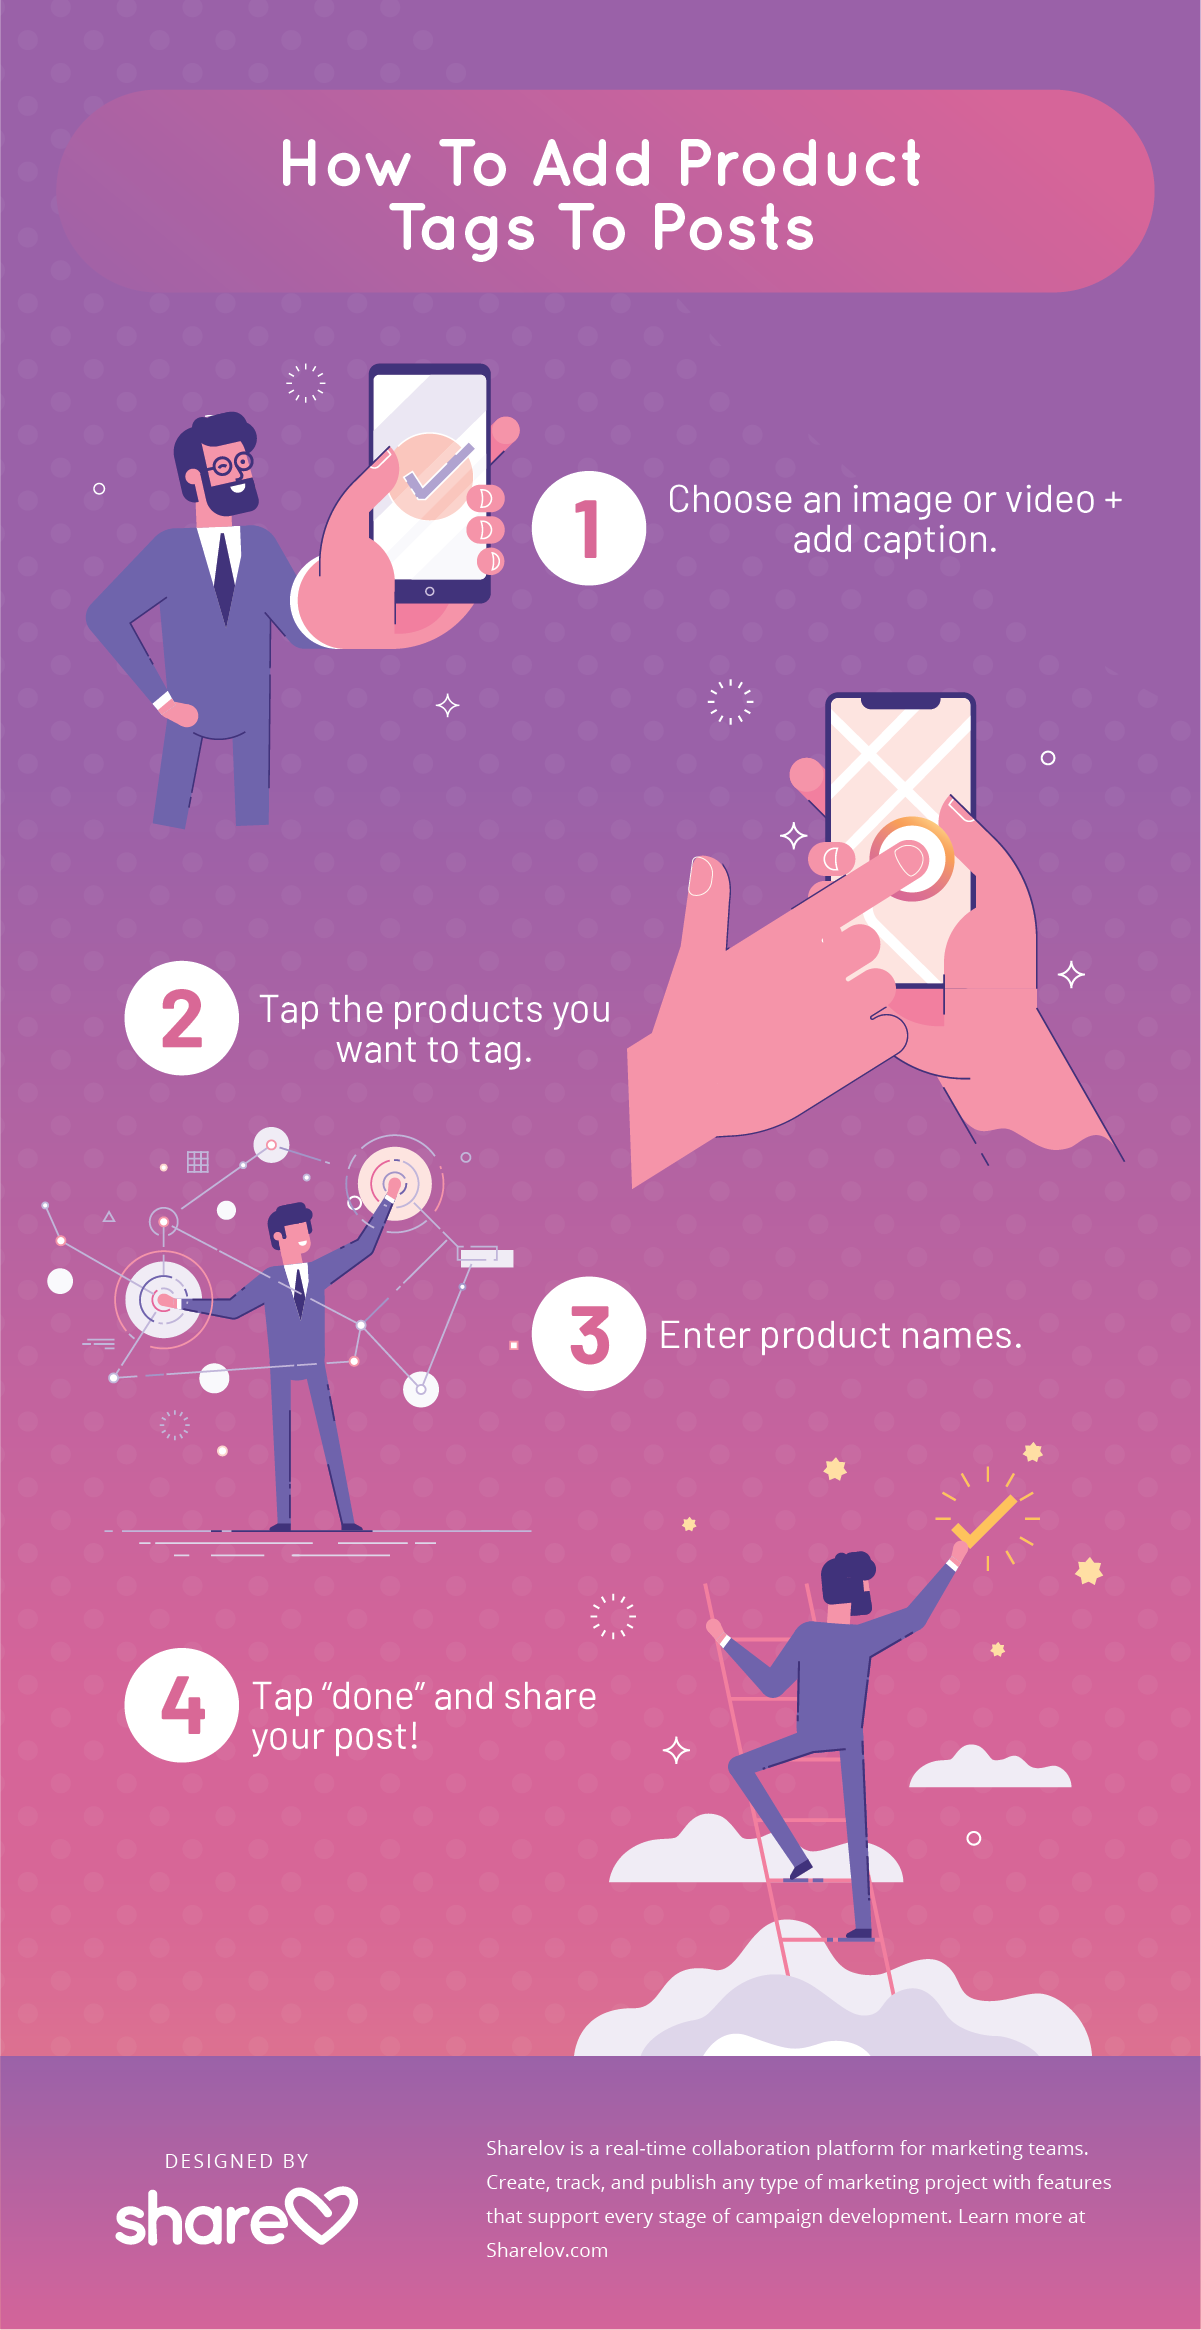
How To Add Product Stickers In Stories
You can add up to one product sticker per Story.
Here’s how:
- Choose the photo or video to upload to your Story.
- Choose a product sticker from the sticker tray.
- Choose the product from your catalog.
- Arrange the sticker where you’d like it to appear in your Story. You can change the text color by tapping the sticker.
- Share your Story.
7. Track Your Progress With Instagram Insights
Keep track of your shoppable post and Stories progress with Instagram insights.
Insights offer valuable analytics that help you understand your audience and discover what they respond to.
Instagram Insights offer two metrics that are super-helpful for improving your product sales.
- Product Views: shows you how many times people tapped product tags to view your product pages.
- Product Button Clicks: shows you how many times people tapped on the purchase button of your product page
These two metrics help you understand how well your sales funnel is working, and show what areas you can improve on. Check them frequently to learn how to tweak and improve your content for higher conversions.
8. Promote Your Products
Shoppable posts and Stories are a great excuse to create your next Instagram marketing campaign.
Before you begin selling, check out our Ultimate Guide to Shopping on Instagram. You’ll find tips, examples, and ideas to help make your shoppable posts and Stories irresistible.
We’d really like to know how it’s going for you! Have you tried shoppable images or videos yet? How was the response?
Tell us about it in the comments section below, and feel free to post your own ideas and tips, too!
