Let’s talk about appearances for a minute.
How you present your Facebook posts — the image, description, and link — has an influence on people’s perception of your brand.
The problem is, sometimes Facebook’s auto-generated previews don’t come out right when you’re sharing blog posts or other content from your website.
So when you share a blog post to Facebook, and the auto-generated preview pops up with the wrong image or title, it can be a problem.
We’ve got you covered.
Today, we’re going to show you a quick and easy way to make sure that all your Facebook post previews look exactly the way you want them to.
Facebook provides a free tool called the “Debugger” on its developer site.
The Debugger lets you control the auto-generated previews from your blog articles and site content.
And you don’t need to be a developer to use it.
This article makes it quick and easy to use the Facebook Debugger – even if you don’t know a line of code.
Bookmark this article now so you don’t have to go searching for it next time your Facebook previews don’t come out perfectly!
What is the Facebook Debugger?
Facebook Debugger is a free online tool that helps you control what other people see when your blog posts are shared on Facebook.
The Debugger tool is essential for brands with Facebook pages because sometimes blog posts or web page previews don’t show up right when you share them.
For example maybe an older image shows up, or Facebook grabs a random image from your article instead of the main one.
Facebook Debugger can review any webpage in seconds and generate a report that lets you know precisely why it’s publishing your previews the way it is. Then, you can use the information in its report to make changes to your HTML or tags to correct the problem.
Keep reading, and we’ll walk you through the Debugger tool step by step, so you understand how to view, adjust, and refresh your Facebook previews.
How Does Facebook Select (“Scrape”) the Image and Caption for Your Blog Posts?
When you or your website visitors share your blog posts to Facebook, it generates a preview that usually includes an image and caption.
Below is an example of a Facebook preview. It shows a blog post that was shared from our blog to a Facebook page by a 3rd party.

Facebook previews include an:
- Introduction
- Image
- Caption
The introduction is the message someone writes when sharing the post.
The image and caption are determined by a Facebook crawler. The crawler “scrapes” your web page’s HTML to select the image and caption it uses when the post is shared to Facebook.
After Facebook has scraped a web page, it stores the information in its own cache for 30 days.
So, when the next person shares the same post to Facebook, the system doesn’t recrawl your web page. Instead, it re-publishes the same image and caption that it used last time.
A few things can go wrong because of this scraping process.
- Facebook crawlers might grab an image that’s different from the beautiful header image you’ve chosen for the post.
- When you update the post with fresh images or headlines, the Facebook preview might show the old version instead of your new one.
- Your Open Graph tags (og tags) might not be set up correctly, so the wrong image and caption shows up in the preview.
That’s where Facebook Debugger comes in. Testing your web page with the Debugger is as simple as entering the web page address into its search bar, then reviewing the report it generates.
How to Use the Facebook Debugger Tool
Let’s talk a walk through how you’ll use the Facebook Debugger tool to control what shows up when you post blog articles to Facebook. You might want to follow along by Debugging one of your own pages as we take you through the following steps.
Step 1: Navigate to the Facebook Debugger Tool
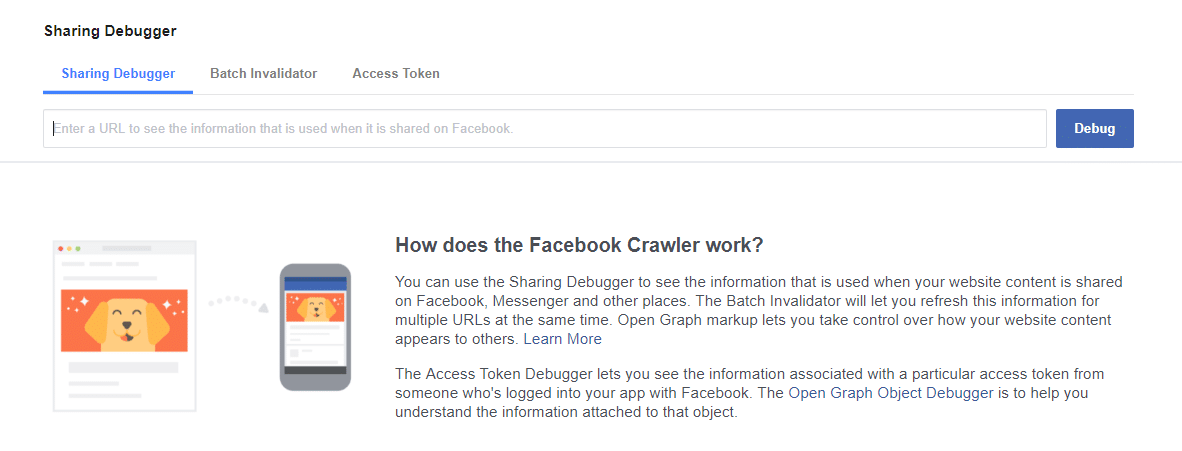
You can access the Debugger tool by going directly to the Sharing Debugger page.
Or, navigate to Facebook for Developers > More > Tools > Sharing Debugger.
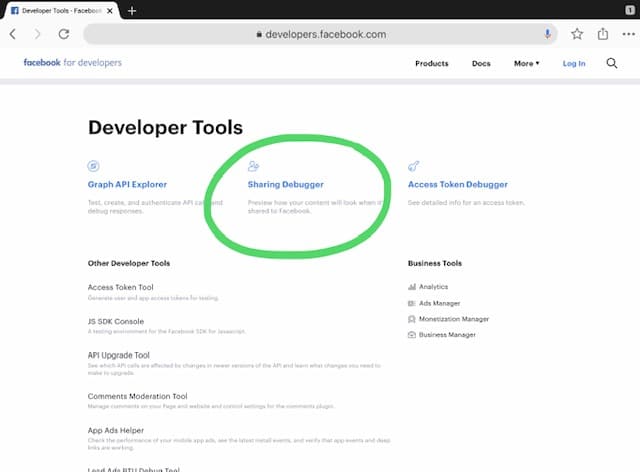
If you’re not already logged in, you’ll need to sign in.

The page defaults to the Debugger tab, but if it’s your first time here, you should double check to make sure the “Sharing Debugger” is tab highlighted.
Now the tool is ready to use.
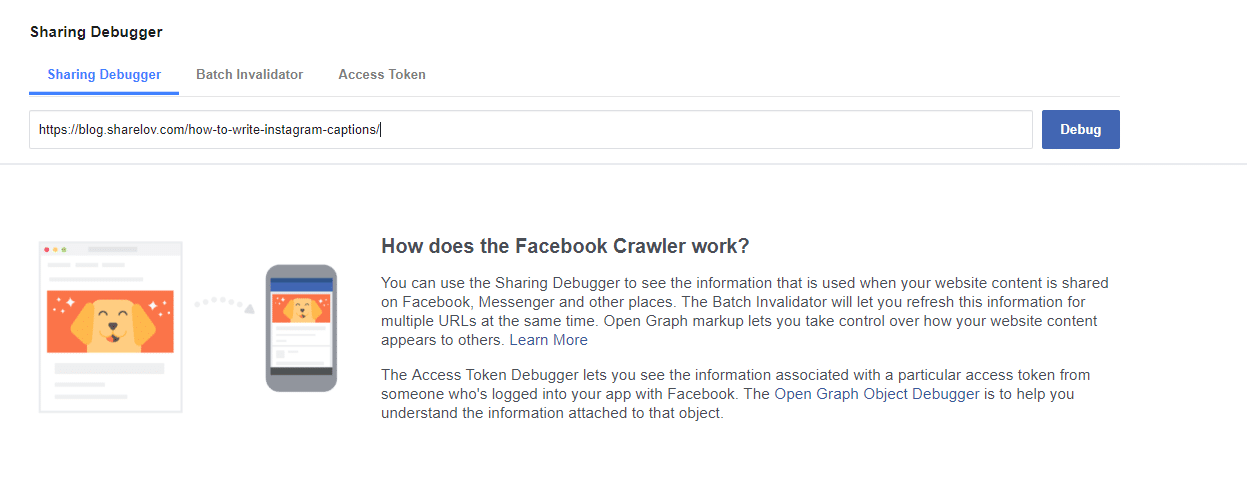
Step 2: Enter The Website Address Of The Page You Want To Test.
Go ahead and enter the web address of the page you want to review. You can review a post from your blog or any page from your website.
Next, click “Debug” and wait for the results.
Step 3: Review Facebook Debugger Results
The Debugger works quickly. As soon as you enter your web page address and click “Debug,” the tool gets to work examining your web page and returning results instantly.
Below is an example of what the Debugger report looks like.
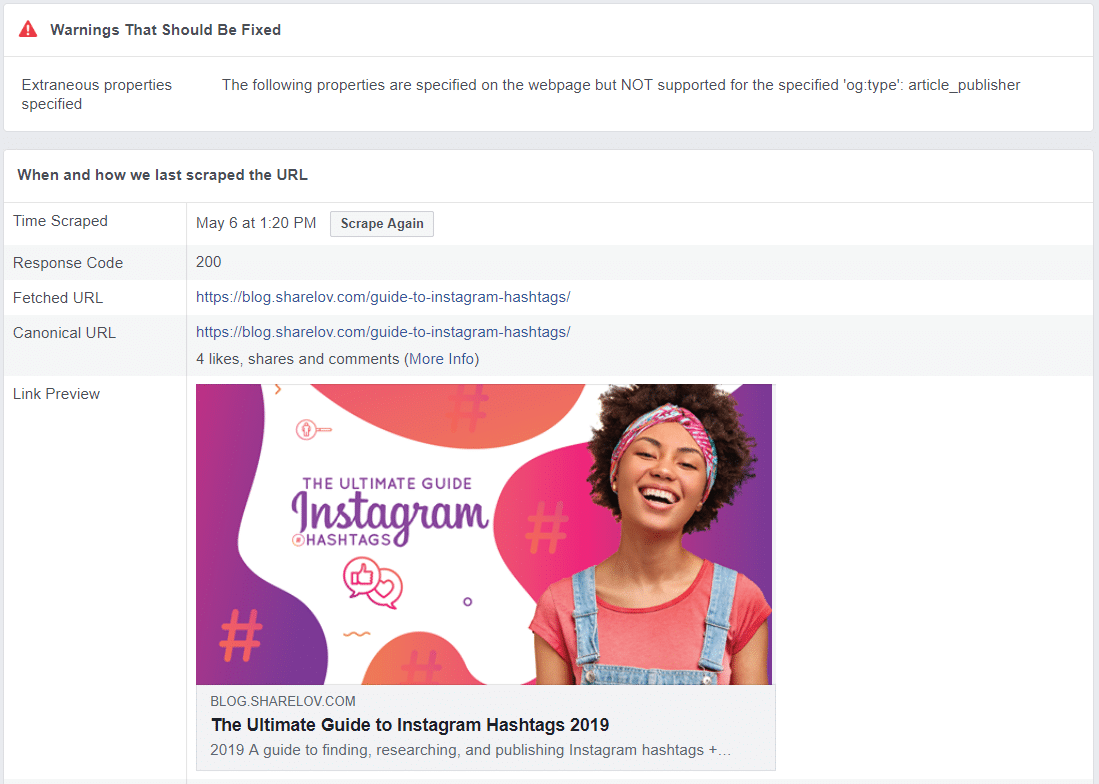
The top of the report, titled “warnings,” shows issues that need to be fixed on your page.
Next, it tells you when the page was last scraped and lists the fetched and canonical URLs.
You’ll notice a full preview that shows what your blog post or page will look like when shared to Facebook
Step 4: Clear the Caches
If your preview doesn’t show up the way you want it to, start by clearing your caches. It’s possible that the preview is defaulting to an old version because WordPress or Facebook is delivered an outdated version.
- If you’re using WordPress, clear your WordPress cache.
- Clear the Facebook cache by clicking “Scrape Again” toward the top of the Debugging report.
If the preview still isn’t right, move on to the next step so you can adjust your settings.
Step 5: Adjust Open Graph Settings If Needed
If clearing your WordPress and Facebook cache doesn’t fix your blog post preview, you’ll need to scroll down on the Facebook Debugger report to learn more about the issues.
The lower half of the Debugger report offers full details that your website’s back-end team can use to correct the problem.
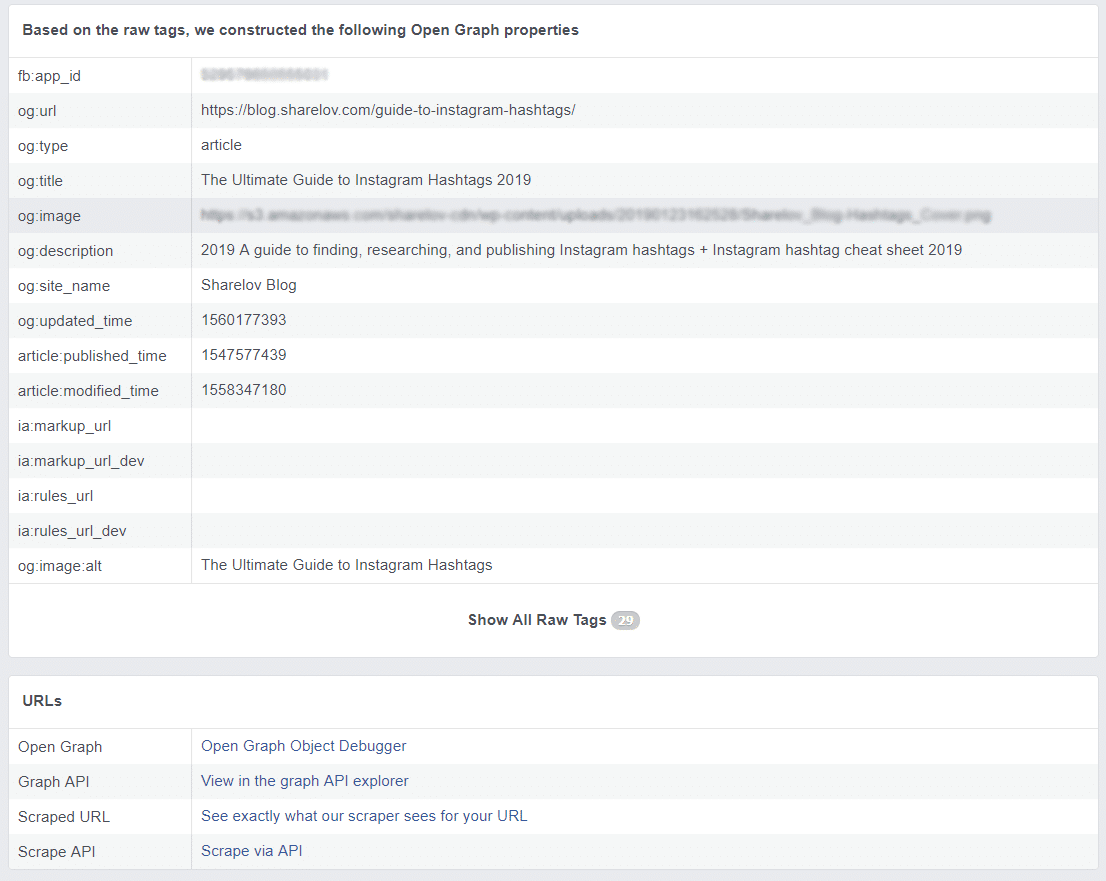
If, after clearing your WordPress and Facebook caches, your previews still aren’t showing correctly, then you’ve probably got an issue with your Open Graph tags (og tags).
Og tags are bits of code that are added to your pages manually. They help integrate Facebook with other websites by allowing them to become rich “graph” objects, according to Neil Patel.
Og tags are also used for sites like Twitter, LinkedIn, and Google.
According to Patel, these social meta tags are vital to today’s marketing since they “can affect conversions and click-through rates hugely.”
Patel goes on to explain that “Adding Open Graph tags to your website won’t directly affect your on-page SEO, but it will influence the performance of your links on social media, so that means it’s worth looking into.
If you’re using WordPress, og tags can be managed through plugins like Yoast SEO or Open Graph for Facebook, Google+ and Twitter Card Tags
Step 6: Re-run Facebook Debugger To Verify Changes
Once you’ve identified and fixed the issues causing problems to your preview(s), clear your WordPress and Facebook caches one more time before re-running the Facebook Debugger tool.
The preview should now show up exactly as you hoped it would!
How To Create The Best Facebook Previews
Here are a few tips to help you get the most attention from your Facebook blog previews.
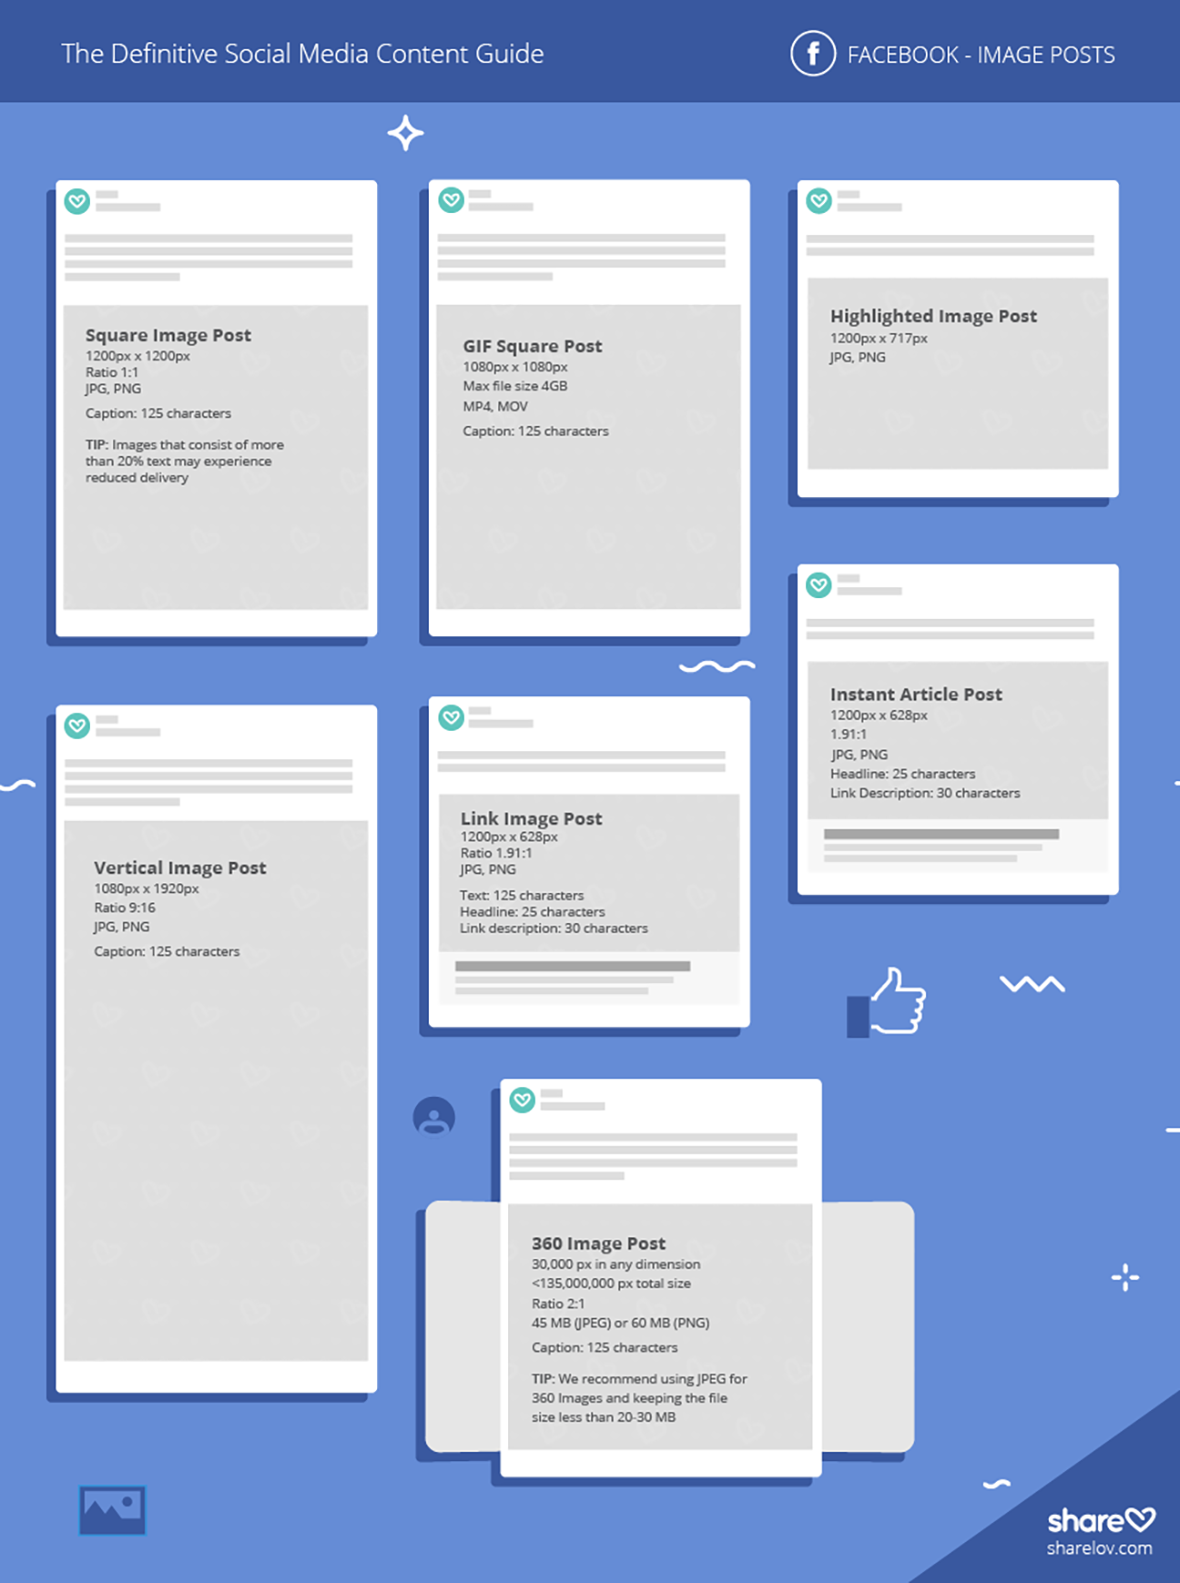
Always use the correct Facebook image sizes.
For example, a standard linked post image should be sized at 1200 x 628. However, many types of posts require different sizes.
Hop on over to our 2019 Social Media sizing guide for a listing of the latest size requirements for images and videos on Facebook, Twitter, Instagram, and more.
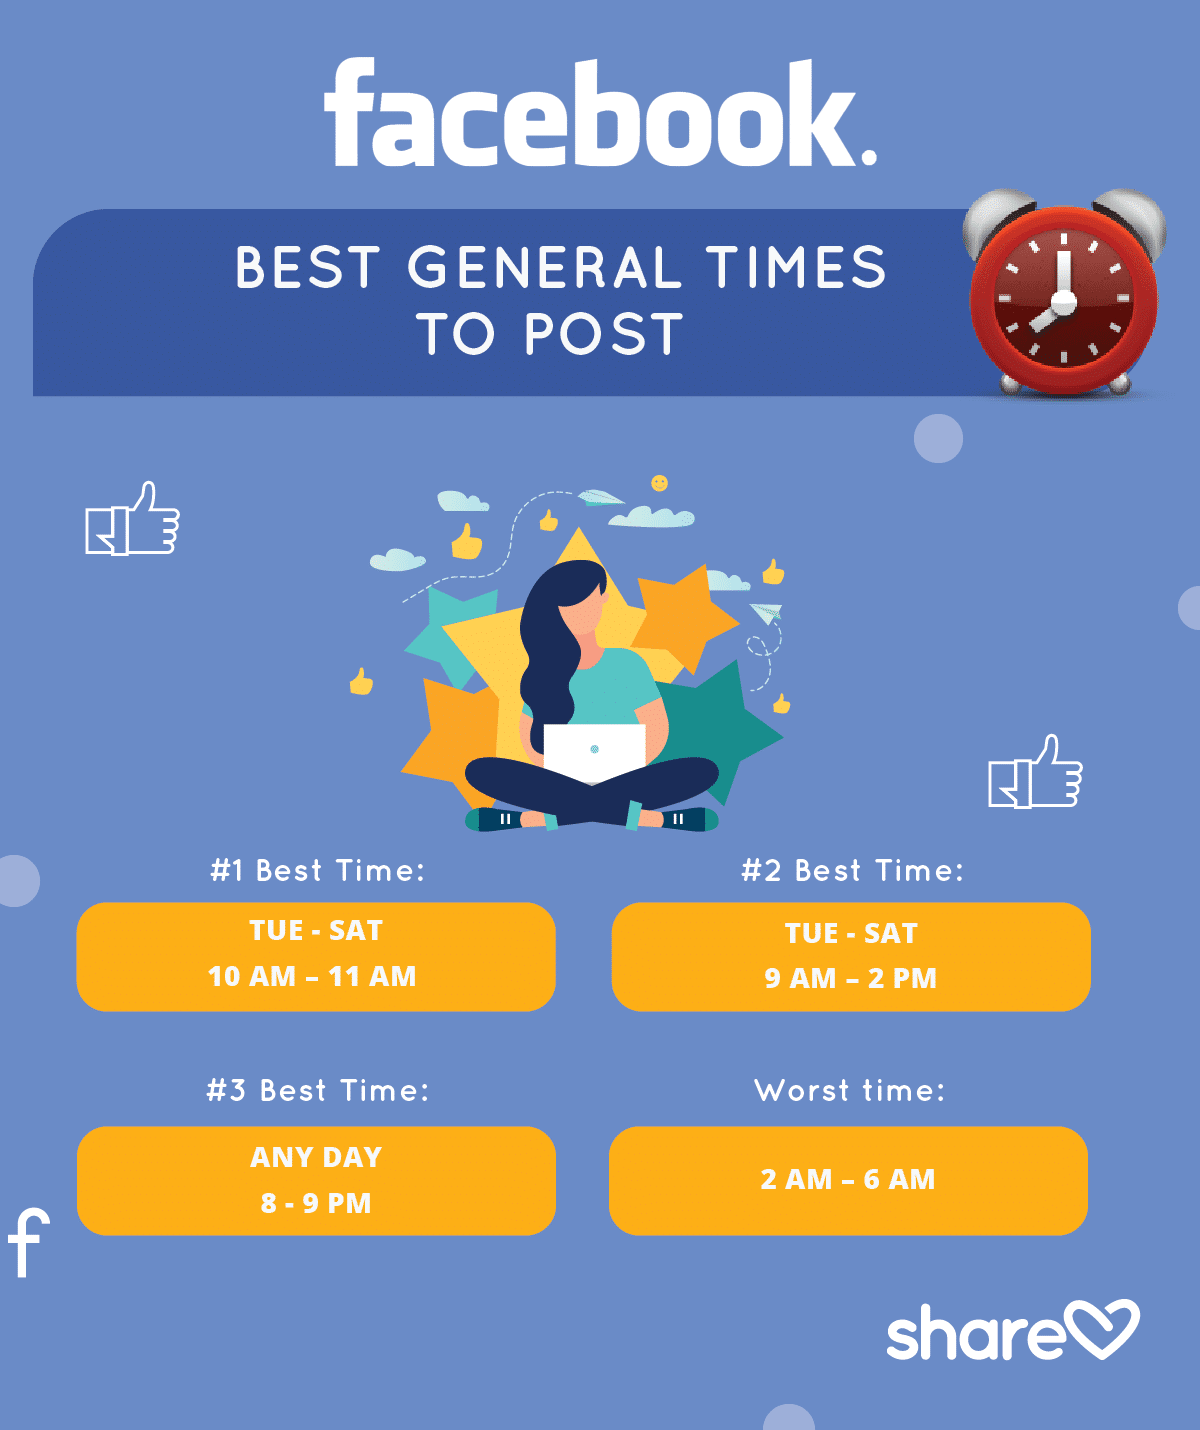
Post when your audience is online.
Share your posts at the most popular times for your current audience.
Use Facebook Audience Insights to learn when your audience is online, so you can determine the best times for your brand to share blogs posts to Facebook.
Or, check out the guide we put together that tells you when people are most likely to interact with brands on Facebook.
Use Facebook Paid Advertising
Advertising on Facebook can be super-helpful in reaching new people and growing your audience. Consider investing in paid advertising to support your Facebook posts and high-quality content.
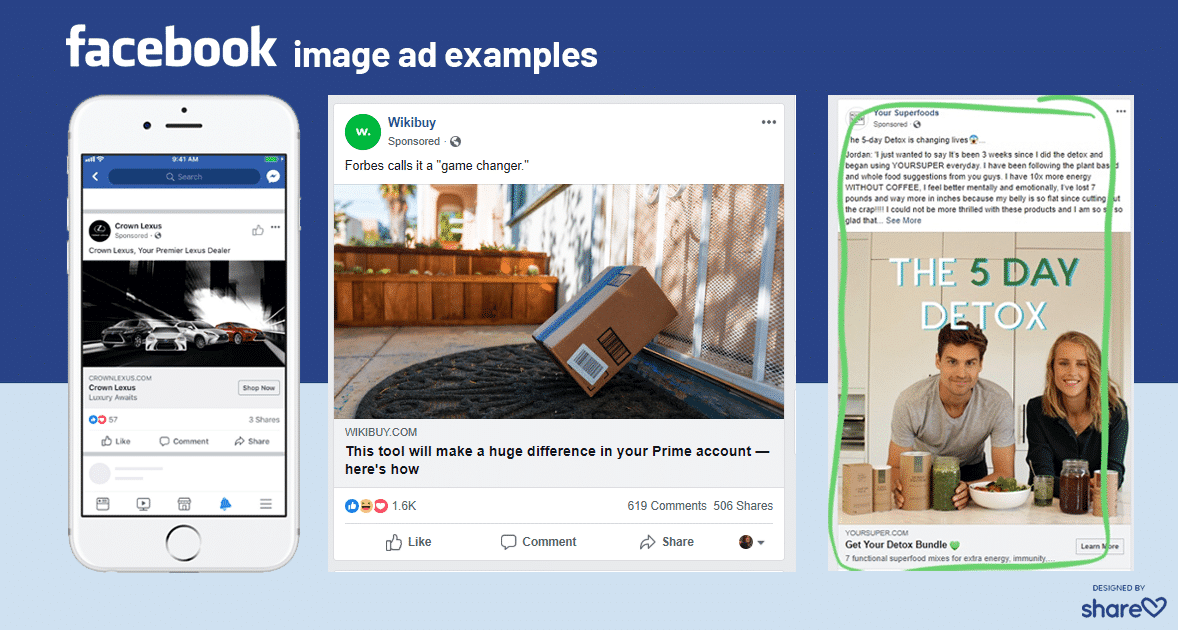
Facebook ads allow you to control your own budget, and provide options that any-sized business can afford.
Use Facebook Debugger to Enhance Your Blog Post Previews
Facebook Debugger is a free tool that allows you to identify problems related to your blog post previews on Facebook.
Use the Facebook Debugger tool to ensure that you’ve got the correct image and caption showing up when people share from your website to Facebook.
Paid advertising, correct image sizing, and posting at the best times are also excellent ways to boost the performance of your blog post content on Facebook!





This is all well and good but doesnt address the problem. I was doing fine until one day the links I post stopped showing previews. No explanation. Debugging tool ineffective. Why isnt there a simple method to fix this, like an on/off switch?